


Cat Eyeliner Tutorial: Your Easy Guide to a Stunning Cat Eye
Cat Eyeliner Tutorial: Your Easy Guide to a Stunning Cat Eye
Table of Contents
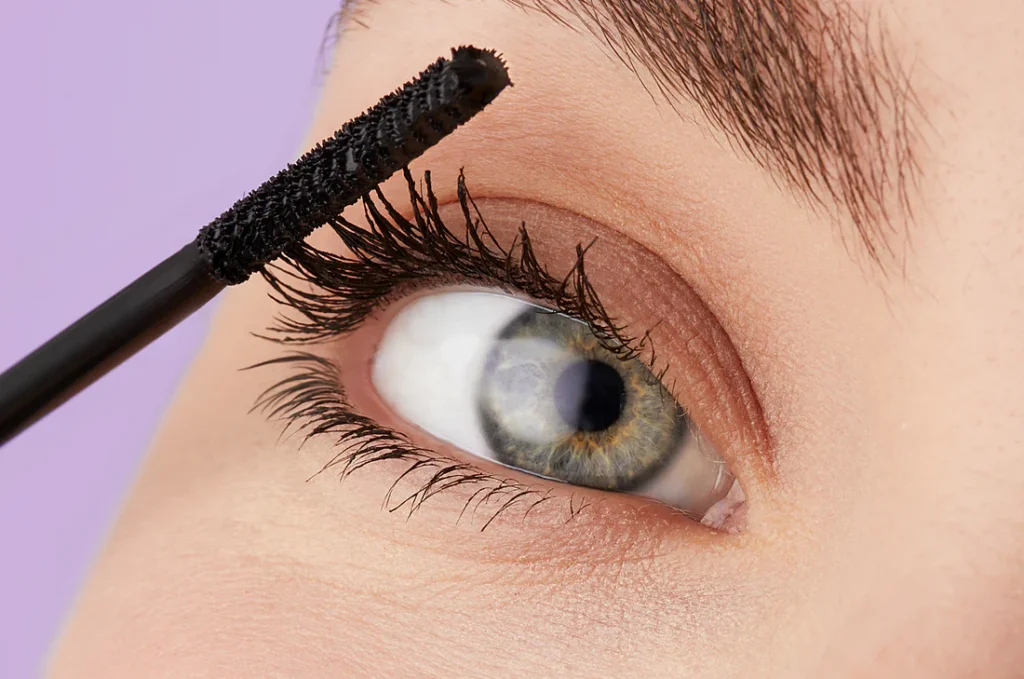
The classic cat eye: a timeless look that exudes sophistication and allure, flattering every eye shape imaginable. From the sultry elegance it lends to almond eyes to the playful lift it brings to hooded lids, the cat eye transcends trends, remaining a staple in every beauty enthusiast’s arsenal. But let’s be honest, achieving that flawless flick can be daunting, especially for beginners. Fear not! This comprehensive guide will demystify the art of the cat eye, providing you with simple, effective techniques tailored to your unique eye shape and preferences.
Finding Your Perfect Cat Eye: A Guide to Eye Shapes
Explanation:
“Just like everyone has their own unique features, our eyes come in different shapes. To make your cat eyeliner look its best, it’s essential to tailor it to your specific eye shape. This section will help you identify what type of cat eyeliner works best for you and how to apply it flawlessly.”
(Instead of “Just as every feline possesses its own unique charm, so do our eyes. Understanding your eye shape is paramount to creating a cat eye that accentuates your natural beauty.”)
Eye Shape Specifics:
- Round and Large Eyes:
- “If you have round and large eyes, focus on drawing the eyeliner outwards from the outer corner. Avoid extending the tail towards the inner corner, as this will emphasize the roundness.
- To create an elongated effect, extend the tail of your eyeliner further.
- (Instead of “Round and Large Eyes: To avoid exaggerating roundness, focus on extending the line outwards rather than inwards. A longer, more dramatic tail will create a captivating, elongated effect.)
- Small Eyes:
- To make small eyes appear larger, add a small tail along the lower lash line, parallel to the upper tail, in addition to the upper flick.
- Fill the space between the two tails with a light eyeshadow or a white pencil.”
- (Instead of “Small Eyes: The key here is creating the illusion of spaciousness. Adding a delicate tail along the lower lash line, parallel to the upper one, can significantly enhance the perceived size. Fill the gap between the lines with a light shade to further amplify the effect.)
- Hooded Eyes:
- “For hooded eyes, opt for a thin and short cat eyeliner. A thick line will get lost under the eyelid.
- Use light or brown eyeliner shades to create a lifted appearance.”
- (Instead of “Hooded Eyes: Less is more! A thick line will disappear beneath the lid. Opt for thin lines and lighter shades like browns to create a lifted, more open appearance.”)
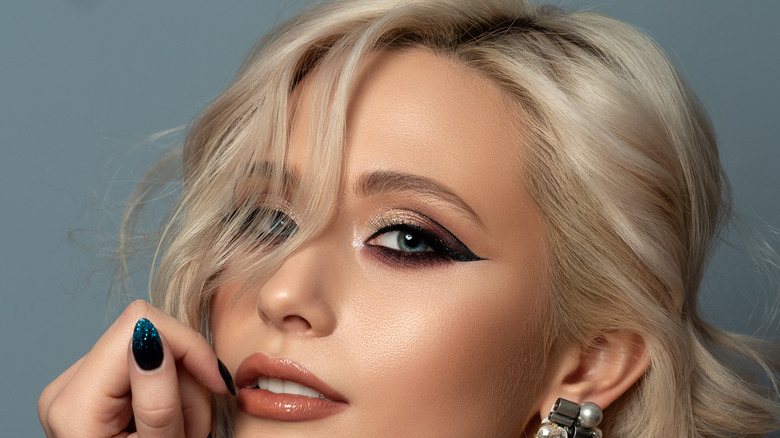
- Almond Eyes:
- “Almond eyes look great with a wider cat eyeliner.
- Start drawing the eyeliner slightly away from the inner corner and extend the tail outwards.”
- (Instead of “Almond Eyes: You’re in luck! Almond eyes can confidently rock a bolder, wider cat eye. Extend the line outwards for a truly striking and dramatic look.)
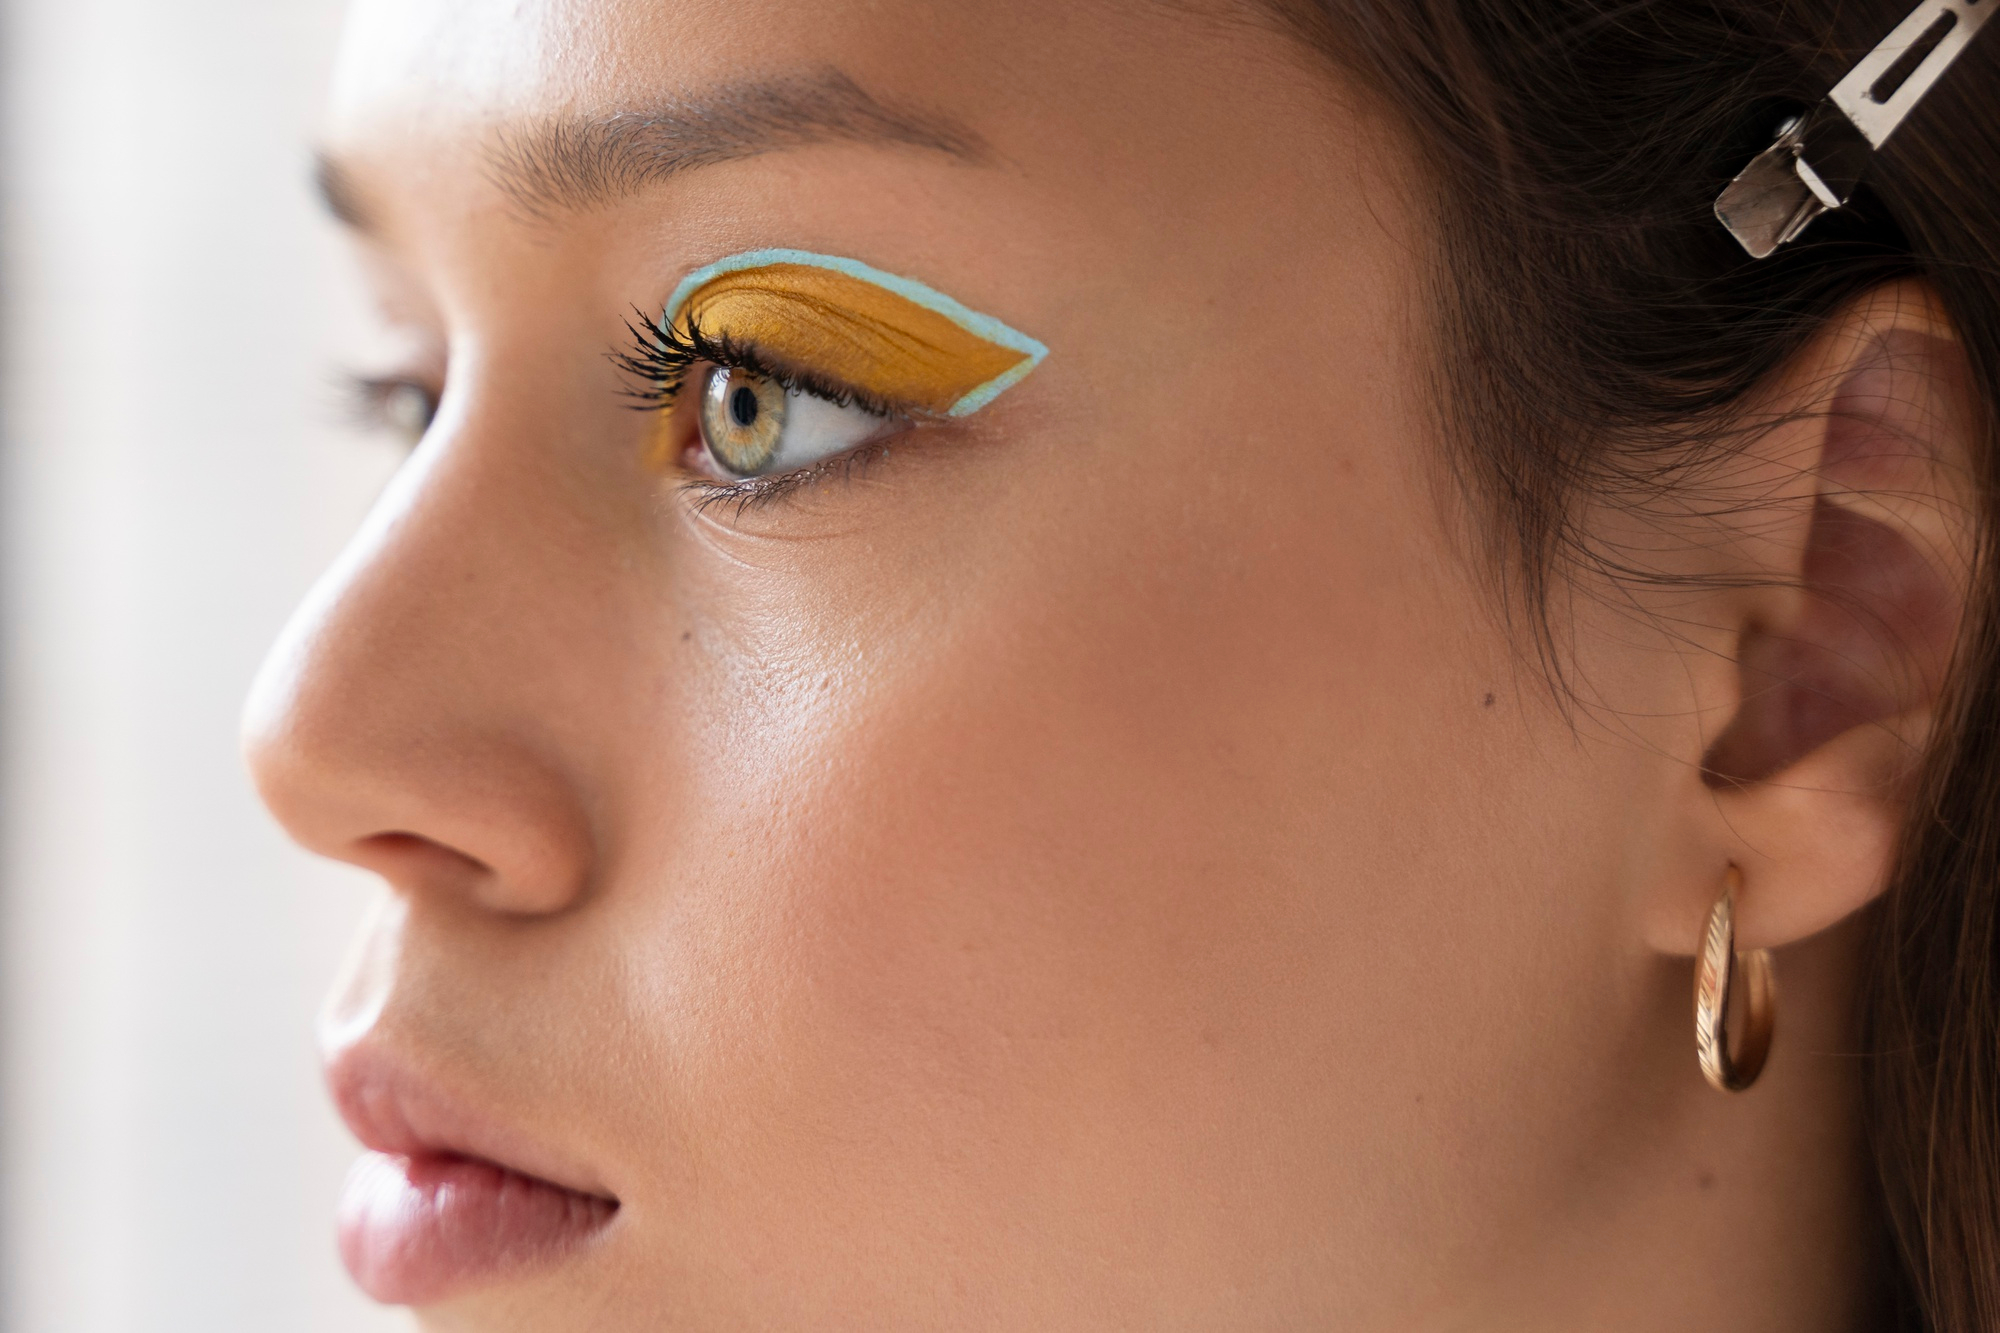
- Downward-Sloping Eyes:
- “For downward-sloping eyes, draw the eyeliner diagonally upwards from the inner corner.
- Add color or glitter for an extra touch of glamour.
- (Instead of “Downward-Sloping Eyes: Lift those corners! An upward flick from the inner corner will instantly elevate your gaze. Consider adding a pop of color or glitter for an extra touch of glamour.)
The Artist’s Toolkit: Essential Eyeliner Products

Explanation:
“Before you start creating your perfect cat eye, it’s important to choose the right eyeliner. Luxelasho offers a variety of high quality eyeliners to fit your needs. Here’s a breakdown of the different types and what they’re best for.”
(Instead of “Before embarking on your cat eye journey, let’s explore the essential tools of the trade. Luxelasho offers a curated selection of high-quality eyeliners to suit every need and preference.”)
Product Descriptions:
- Liquid Eyeliner:
- “For a precise, bold line that makes your eyes stand out, liquid eyeliner is the best choice. It’s great for creating sharp wings and dramatic looks.
- Examples: Stila and KVD Vegan Beauty are known for their liquid eyeliners that offer smooth application and long-lasting wear.”
- (Instead of “Liquid Eyeliner: For a sharp, defined line that commands attention, liquid eyeliner is your go-to. Brands like Stila and KVD Vegan Beauty offer exceptional liquid liners known for their precision and long-lasting wear.”)
- Gel Eyeliner:
- “If you want flexibility, gel eyeliner is a fantastic option. You can create both defined lines and blended, smoky effects. It’s also known for its long wear.
- Example: Bobbi Brown’s Long-Wear Gel Eyeliner is a popular choice for its creamy texture and staying power.”
- (Instead of “Gel Eyeliner: Offering versatility and blendability, gel eyeliner allows for both bold definition and subtle smokiness. Bobbi Brown’s Long-Wear Gel Eyeliner is a cult favorite, celebrated for its creamy texture and unwavering staying power.”)
- Pencil Eyeliner:
- “For a softer, more natural look, pencil eyeliner is ideal. It’s easy to apply and blend, making it perfect for creating subtle definition or a smoky eye.
- Example: Urban Decay’s 24/7 Glide-On Eye Pencil is known for its smooth application and rich colors.”
- (Instead of “Pencil Eyeliner: Ideal for creating a softer, more diffused look, pencil eyeliner provides a gentle touch. Urban Decay’s 24/7 Glide-On Eye Pencil is renowned for its smooth application and richly pigmented shades.”)
Alright, let’s expand on the “Mastering the Techniques” section to provide more detailed and user-friendly explanations:
Mastering the Techniques for Cat Eyeliner Tutorial: From Simple to Sophisticated
“Now that you’ve chosen the right eyeliner, let’s explore the various techniques to help you create your perfect cat eye. Whether you’re a beginner or looking to refine your skills, these methods offer something for everyone.”
Expanded Technique Descriptions:
- The Tape Trick: Precision with Adhesive
- “This method is ideal for beginners or anyone seeking a sharp, clean line. Take a small piece of surgical or masking tape and place it diagonally from the outer corner of your eye towards the end of your eyebrow, creating a guide. Ensure the tape is firmly pressed to your skin to prevent any bleeding. Apply your eyeliner along the edge of the tape, extending it to your desired length. Once the eyeliner is dry, carefully peel off the tape to reveal a crisp, sharp wing. This technique ensures symmetry and eliminates guesswork.”
- The Card Method: Straight Lines Made Easy
- “A credit card, business card, or any straight-edged object can be your best friend when creating a precise flick. Hold the card diagonally against the outer corner of your eye, aligning it with the desired angle of your wing. Use the edge of the card as a guide to draw a straight line, extending it outwards. This method is excellent for creating a sharp, defined flick with minimal effort.”
- The Spoon Technique: Curvature and Symmetry
- “For a perfectly rounded and symmetrical flick, the spoon technique is a game-changer. Position the handle of a spoon diagonally against the outer corner of your eye, aligning it with the desired angle of your wing. Use the edge of the handle to draw the initial line. Then, rotate the spoon so that the curved part rests against your eyelid, creating the rounded portion of the wing. Fill in the space between the lines to complete the flick. This method provides a smooth, consistent curve.”
- Stencil Magic: Effortless Consistency
- “Pre-made cat eye stencils offer a foolproof way to achieve a consistent and flawless shape. These stencils come in various shapes and sizes, allowing you to customize your look. Simply place the stencil against your eyelid, aligning it with the desired position. Fill in the stencil with your chosen eyeliner, and carefully remove it to reveal a perfectly shaped wing. This technique is ideal for those who struggle with freehand application.”
- The Dotting Technique: Building the Line
- “This technique is excellent for those who prefer a more controlled approach. Start by placing small dots along your lash line, extending them outwards to create the desired length of your wing. Then, carefully connect the dots with your eyeliner, creating a smooth, even line. This method allows you to gradually build the line, ensuring precision and symmetry.”
- The Stamp Method: Instant Wing Creation
- “Some eyeliners feature a stamp on one end, designed to simplify the process of creating the wing. Simply press the stamp against the outer corner of your eye, aligning it with the desired angle. The stamp will create a perfectly shaped wing, which you can then connect to your lash line with the eyeliner. This method is incredibly fast and easy, making it ideal for those who are short on time.”
Luxelasho’s Signature Approach: A Step-by-Step Guide
- Base Layer: Begin by drawing a thin line along your lash line, from the inner corner to the outer corner.
- The Flick: Visualize a line extending from the outer corner of your eye towards the end of your eyebrow. Draw a line along this imagined path.
- The Triangle: Connect the end of the flick back to the middle of your lash line, forming a small triangle. Fill it in with your chosen eyeliner.
- Clean Up: Use a cotton swab dipped in makeup remover to refine any imperfections and create a sharp, clean edge.
Elevate Your Eye Makeup with Luxelasho
Ready to unleash your inner feline and master the art of the cat eye? Luxelasho offers a curated selection of premium eyeliners and tools to help you achieve your desired look. Visit our website today and discover the perfect products to enhance your natural beauty and create captivating eye looks.
Frequently Asked Questions
- What’s the best eyeliner for beginners? Pencil or gel eyeliners are generally more forgiving and easier to control for those new to the cat eye.
- How can I prevent my cat eye from smudging? Opt for waterproof or smudge-proof eyeliners and set them with a translucent powder for added longevity.
- Can I wear cat eyeliner with glasses? Absolutely! Simply adjust the thickness and length of the flick to complement your frames and create a harmonious look.